HOW TO MEASURE YOUR ROOM
Before we dive into designing your space, let's get the basics right. Accurate measurements of your room are key to creating a design that fits perfectly. Follow the simple steps below to make sure we capture all the details.
Start by grabbing a few essentials: a pencil, paper, and either a measuring tape or a measurement app on your device.
01.
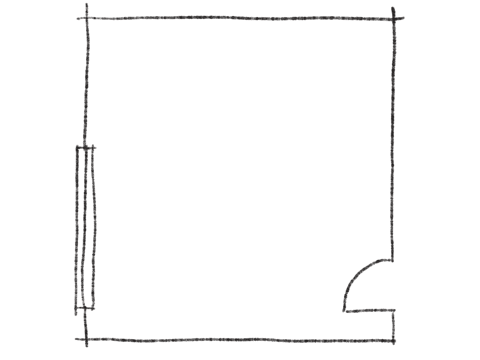
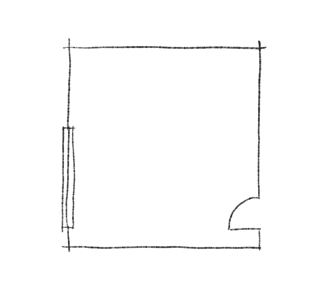
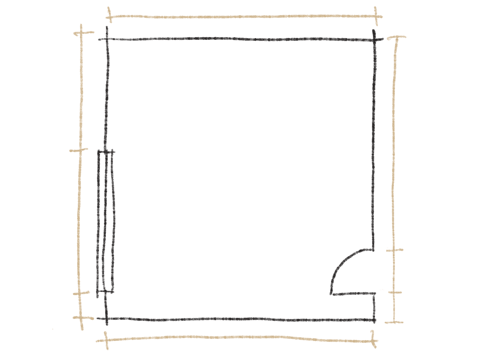
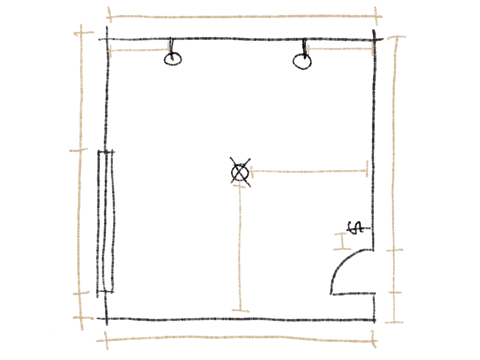
SKETCH
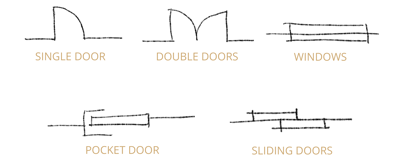
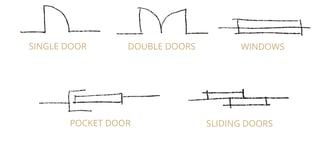
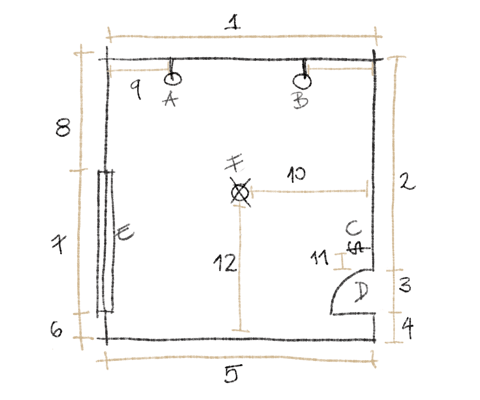
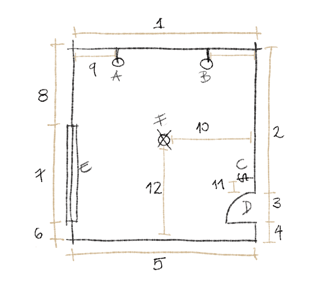
Take a moment to observe your room. Look for key details, like windows, doors, unique features, and any built-ins. Now, create a simple outline of the room on your paper, using the symbols below. For any special elements like wall bump-outs or fireplaces, capture their basic shapes in your outline.
02.
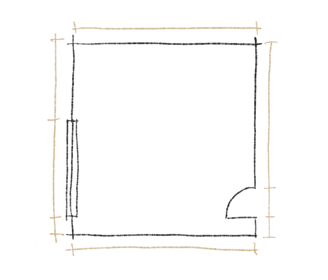
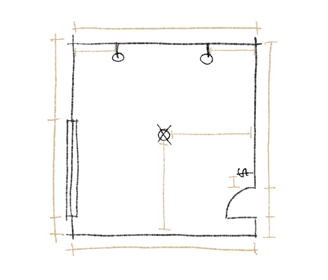
ADD DIMENSION LINES
Add dimension lines in the exterior of the layout to capture every measurement you'll need. Start with the large, uninterrupted walls—they're the easiest. Then, move on to any walls with increments or features.
For instance, if there's a window on a wall, measure the length of the wall to the left of the window, the width of the window, and the length of the wall to the right of the window.
03.
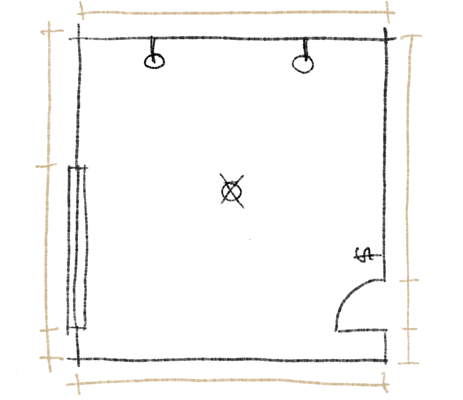
ADD DETAILS
Now, let's add essential details. Below you will find common symbols for light switches, electrical outlets, and luminaires. Place these symbols on your sketch in their approximate locations.


04.
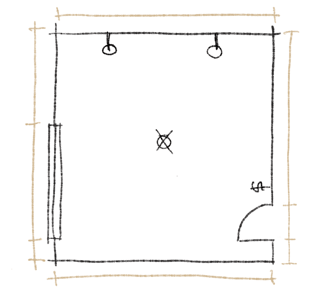
ADD INTERIOR DIMENSION LINES
Now, for each interior symbol added incorporate interior dimension lines. Extend these lines from a common reference point, typically a wall, to the respective symbol.
05.
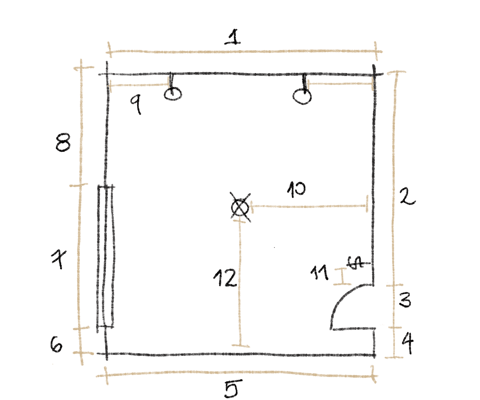
NUMBER DIMENSION LINES
Begin the cataloging process clockwise, assigning each line a number. Once the exterior lines are labeled, transition to the interior lines, continuing clockwise with the next number in the sequence.
06.
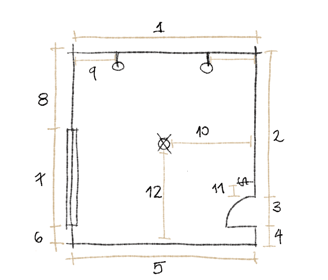
CATALOG INTERIOR DETAILS
Moving clockwise, begin naming each interior detail starting with the letter 'A.' As you progress through the interior details—windows, doors, light switches, electrical outlets, and luminaires—continue assigning letters in sequence.
07.
MEASURE
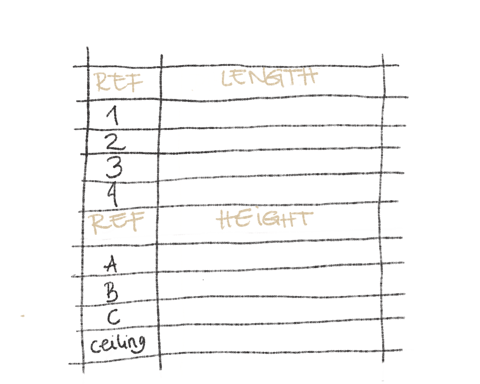
Let's get hands-on with that measuring tape! Create a chart similar to the example, starting with the reference number for dimension lines followed by the reference letter for interior details.
Begin at one corner of the room and proceed clockwise, measuring each dimension line length you've cataloged filling the chart as you go.
Next, shift your attention to measuring heights for interior details. Windows will require two measurements: floor-to-window and window height. Ensure you conclude the chart by noting the ceiling height.

08.
TAKE PHOTOS
Now, it's time to capture your room from every angle. Grab your camera or smartphone and position yourself in each corner of the room. Ensure each photo includes a bit of the floor and ceiling to provide a comprehensive view.
09.
SHARE
Congratulations! You've successfully completed the process, and now we're ready to bring your vision to life.
Please email us containing your layout sketch, the measurement chart detailing lengths and heights, and the photos you've taken from each corner of the room.